Python embeddedのエラー対処法

Python embeddedでmatplotlibを使おうとするとimport errorが起きるエラーです.

import matplotlib

これでエラーが起こる.

ImportError: DLL load failed: The specified module could not be found.

原因

matplotlibを動作するにはMicrosoft Visual C++ のダウンロード が必要です.下記からダウンロードする必要があります.

https://support.microsoft.com/ja-jp/topic/%E6%9C%80%E6%96%B0%E3%81%AE%E3%82%B5%E3%83%9D%E3%83%BC%E3%83%88%E3%81%95%E3%82%8C%E3%82%8B-visual-c-%E3%81%AE%E3%83%80%E3%82%A6%E3%83%B3%E3%83%AD%E3%83%BC%E3%83%89-2647da03-1eea-4433-9aff-95f26a218cc0

参考文献

https://www.python.org/downloads/windows/

Angularでリアルタイムに変化するグラフを書く

1

リアルタイムにデータが移り変わるグラフです.

realtime-streaming-data-with-angular-chartjs

概要

Angularでリアルタイムにデータが移り変わるグラフを作成します.

プロジェクトの作成

% ionic start app-name-streaming tabs --type=angular

プラグインのインストール

npm install ng2-charts@2 chartjs-plugin-streaming@1 --save
npm install chart.js@2.9.3 --save

プラグインの設定

app.module.tsで設定します.

import { NgModule } from '@angular/core';
import { BrowserModule } from '@angular/platform-browser';
import { RouteReuseStrategy } from '@angular/router';

import { IonicModule, IonicRouteStrategy } from '@ionic/angular';

import { AppRoutingModule } from './app-routing.module';
import { AppComponent } from './app.component';

+import { ChartsModule } from 'ng2-charts';

@NgModule({
  declarations: [AppComponent],
  entryComponents: [],
  imports: [
    BrowserModule,
    IonicModule.forRoot(),
    AppRoutingModule,
+    ChartsModule
  ],
  providers: [{ provide: RouteReuseStrategy, useClass: IonicRouteStrategy }],
  bootstrap: [AppComponent],
})
export class AppModule {}

リアルタイムに変化するグラフをかく

今回はIonicのタブプロジェクトのtab2に追加します.まずtab2.page.moduleにChartModuleを登録します.

import { IonicModule } from '@ionic/angular';
import { RouterModule } from '@angular/router';
import { NgModule } from '@angular/core';
import { CommonModule } from '@angular/common';
import { FormsModule } from '@angular/forms';
import { Tab2Page } from './tab2.page';
import { ExploreContainerComponentModule } from '../explore-container/explore-container.module';

import { Tab2PageRoutingModule } from './tab2-routing.module';
+import { ChartsModule } from 'ng2-charts';

@NgModule({
  imports: [
    IonicModule,
    CommonModule,
    FormsModule,
    ExploreContainerComponentModule,
    Tab2PageRoutingModule,
+    ChartsModule
  ],
  declarations: [Tab2Page]
})
export class Tab2PageModule {}

次にtab2.page.tsとtab2.page.htmlを編集します.

import { Component } from '@angular/core';
import 'chartjs-plugin-streaming';

@Component({
  selector: 'app-tab2',
  templateUrl: 'tab2.page.html',
  styleUrls: ['tab2.page.scss']
})
export class Tab2Page {

  myDataFromServer:number=20;
  updateMyDataFromServerFunction:any;

  datasets: any[] = [{
    data: []
  }, {
    data: []
  }];

  options: any;
  constructor( ) {}

  ngOnInit(){

    this.options= {
      scales: {
        xAxes: [{
          type: 'realtime',
          realtime: {
            onRefresh: (chart: any) =>{
              chart.data.datasets.forEach((dataset: any) => {  
                dataset.data.push({
                  x: Date.now(),
                  y:this.myDataFromServer
                });
              });
            },
            delay: 2000
          }
        }],
        yAxes: [{
          ticks: {
            max:100,
            min:0
          }
        }]
      }
    };
    this.updateMyDataFromServer();
  }

  updateMyDataFromServer(){
    console.log('updateMyDataFromServer() called');    
    this.updateMyDataFromServerFunction = setInterval(() => {
      console.log('called');
      this.myDataFromServer = Math.random() * 100;
      console.log(this.myDataFromServer,'this.myDataFromServer');
    },1000)
  }
}

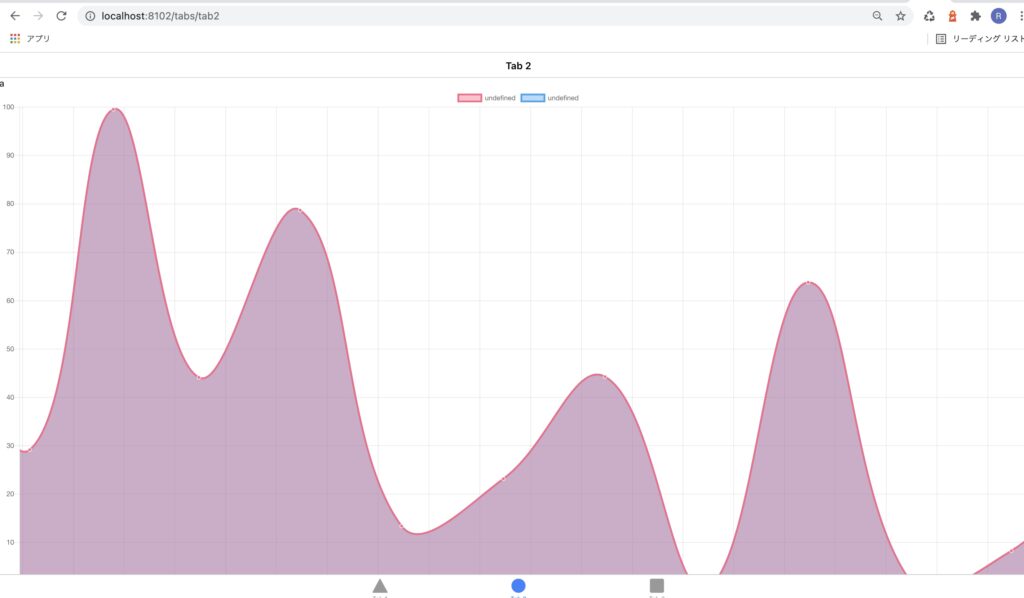
リアルタイムに描写されるグラフが作成できました.

realtime-streaming-data-with-angular-chartjs

環境詳細

{
  "name": "1206_scrach_image",
  "version": "0.0.1",
  "author": "Ionic Framework",
  "homepage": "https://ionicframework.com/",
  "scripts": {
    "ng": "ng",
    "start": "ng serve",
    "build": "ng build",
    "test": "ng test",
    "lint": "ng lint",
    "e2e": "ng e2e"
  },
  "private": true,
  "dependencies": {
    "@angular/common": "~12.0.1",
    "@angular/core": "~12.0.1",
    "@angular/forms": "~12.0.1",
    "@angular/platform-browser": "~12.0.1",
    "@angular/platform-browser-dynamic": "~12.0.1",
    "@angular/router": "~12.0.1",
    "@ionic/angular": "^5.5.2",
    "@nebulae/angular-ble": "^1.0.6",
    "@types/web-bluetooth": "0.0.9",
    "aes-js": "^3.1.2",
    "chart.js": "^2.9.3",
    "chartjs-plugin-streaming": "^1.9.0",
    "ng2-charts": "^2.4.2",
    "rxjs": "~6.6.0",
    "tslib": "^2.0.0",
    "zone.js": "~0.11.4"
  },
  "devDependencies": {
    "@angular-devkit/build-angular": "~12.0.1",
    "@angular-eslint/builder": "~12.0.0",
    "@angular-eslint/eslint-plugin": "~12.0.0",
    "@angular-eslint/eslint-plugin-template": "~12.0.0",
    "@angular-eslint/template-parser": "~12.0.0",
    "@angular/cli": "~12.0.1",
    "@angular/compiler": "~12.0.1",
    "@angular/compiler-cli": "~12.0.1",
    "@angular/language-service": "~12.0.1",
    "@ionic/angular-toolkit": "^4.0.0",
    "@types/jasmine": "~3.6.0",
    "@types/jasminewd2": "~2.0.3",
    "@types/node": "^12.11.1",
    "@typescript-eslint/eslint-plugin": "4.16.1",
    "@typescript-eslint/parser": "4.16.1",
    "eslint": "^7.6.0",
    "eslint-plugin-import": "2.22.1",
    "eslint-plugin-jsdoc": "30.7.6",
    "eslint-plugin-prefer-arrow": "1.2.2",
    "jasmine-core": "~3.7.1",
    "jasmine-spec-reporter": "~5.0.0",
    "karma": "~6.3.2",
    "karma-chrome-launcher": "~3.1.0",
    "karma-coverage": "~2.0.3",
    "karma-coverage-istanbul-reporter": "~3.0.2",
    "karma-jasmine": "~4.0.0",
    "karma-jasmine-html-reporter": "^1.5.0",
    "protractor": "~7.0.0",
    "ts-node": "~8.3.0",
    "typescript": "~4.2.4"
  },
  "description": "An Ionic project"
}

ブラウザからBLEでラズパイとデータをやり取りする方法

1

ブラウザ経由でBLEでラズパイと接続する方法についてまとめます.

ラズパイでBLEペリフェラルを立ち上げる

ラズパイの環境

私はpyblenoというライブラリを使ってペリフェラルを立ち上げることにしましたが,2021年6月現在,ペリフェラルからセントラルに値が変化したときに通知する「Notification」という機能が2018-11-13以降のラズベリーパイOSでは動作しません.公式ドキュメントによると,リナックスカーネルのBluetoothモジュールのバグが原因ということで,通知機能が必須な場合はラズベリーパイのOSを2018-11-13以前にする必要があります.従って,その場合rasbianのStrechやJessiになると思いますのでrasberry piは3B+を使う必要があります.

一方,私はラズベリーパイ4のBモデル(4G)を使ってこの記事を書いていますが,通知機能は使えなかったのでセントラルから定期的に読みに行くことにしてあまり問題は感じていません.

ライブラリをインストールする

sudo pip3 install pybleno

ソースコード

公式に置いてあるサンプルコードを参考に作成しました.main.pyとEchoCharacteristic.pyからなっています.

from pybleno import *
import sys
import signal
from EchoCharacteristic import *

print('bleno - echo');

bleno = Bleno()

def onStateChange(state):
   print('on -> stateChange: ' + state);

   if (state == 'poweredOn'):
     bleno.startAdvertising('echo', ['0000fff0-0000-1000-8000-00805f9b34fb'])
   else:
     bleno.stopAdvertising();

bleno.on('stateChange', onStateChange)
    
def onAdvertisingStart(error):
    print('on -> advertisingStart: ' + ('error ' + error if error else 'success'));

    if not error:
        bleno.setServices([
            BlenoPrimaryService({
                'uuid': '0000fff0-0000-1000-8000-00805f9b34fb',
                'characteristics': [ 
                    EchoCharacteristic('0000fff1-0000-1000-8000-00805f9b34fb')
                    ]
            })
        ])
bleno.on('advertisingStart', onAdvertisingStart)

bleno.start()
print ('Hit <ENTER> to disconnect')

if (sys.version_info > (3, 0)):
    input()
else:
    raw_input()

bleno.stopAdvertising()
bleno.disconnect()

print ('terminated.')
sys.exit(1)

from pybleno import Characteristic
import array
import struct
import sys
import traceback
import random

class EchoCharacteristic(Characteristic):
    
    def __init__(self, uuid):
        Characteristic.__init__(self, {
            'uuid': uuid,
            'properties': ['read', 'write', 'notify'],
            'value': None
          })
          
        self._value = array.array('B', [0] * 0)
        self._updateValueCallback = None
          
    def onReadRequest(self, offset, callback):
        try:
            print('EchoCharacteristic - %s - onReadRequest: value = %s' % (self['uuid'], [hex(c) for c in self._value]))
        except:
            print('error')
        #callback(Characteristic.RESULT_SUCCESS, self._value[offset:])
        callback(Characteristic.RESULT_SUCCESS, array.array('B',[20,90,50,100]))
    def onWriteRequest(self, data, offset, withoutResponse, callback):
        #global data
        #data += 1
        self._value = random.randint(1,10)#data
        print('write called')
        print(data,data[0],data.hex(),'data')
        #print('EchoCharacteristic - %s - onWriteRequest: value = %s' % (self['uuid'], [hex(c) for c in self._value]))
        """
        if self._updateValueCallback:
            print('EchoCharacteristic - onWriteRequest: notifying'); 
            self._updateValueCallback(self._value)
        """
        
        callback(Characteristic.RESULT_SUCCESS)
        
    def onSubscribe(self, maxValueSize, updateValueCallback):
        print('EchoCharacteristic - onSubscribe')
        
        self._updateValueCallback = updateValueCallback

    def onUnsubscribe(self):
        print('EchoCharacteristic - onUnsubscribe');
        
        self._updateValueCallback = None

“`

スマホやPCのブラウザをBLEセントラルにしてラズパイからデータを取得

フレームワークを用いずに素のHTMLとJavaScriptで実装する方法はこちら

<!DOCTYPE html>
<html lang="ja">

<head>
  <meta charset="utf-8"/>
  <title>AI App</title>

  <base href="/"/>

  <meta name="color-scheme" content="light dark"/>
  <meta name="viewport" content="viewport-fit=cover, width=device-width, initial-scale=1.0, minimum-scale=1.0, maximum-scale=1.0, user-scalable=no"/>
  <meta name="format-detection" content="telephone=no"/>
  <meta name="msapplication-tap-highlight" content="no"/>
</head>

<body>
  <h1>お知らせ</h1>
 <div id="text1">Hello BLE</div>
<button id="button1">READ</button>
<button id="button2">Write</button>

<script>

 function uint32ToArrayBuffer(n) {
   const view = new DataView(new ArrayBuffer(4));
   view.setUint32(0, n, false);
   return view.buffer;
 }
    
//ClickEvent
document.getElementById("button1").addEventListener("click", function(){
    console.log('hi');

    // 1.BLEデバイスをスキャンする
navigator.bluetooth.requestDevice({
  acceptAllDevices:true, // 全てのデバイスを対象にスキャンを実施する
  optionalServices:['0000fff0-0000-1000-8000-00805f9b34fb']
}).then(device => {

  // 2.デバイスに接続
  return device.gatt.connect();

}).then(server =>{

  // 3-1.「Service」を指定
  return server.getPrimaryService("0000fff0-0000-1000-8000-00805f9b34fb");

}).then(service =>{
    console.log('hikoko')

  // 3-2.「Characteristc」を指定
  return service.getCharacteristic("0000fff1-0000-1000-8000-00805f9b34fb");

}).then((characteristic)  => {
    console.log('hikoko2')

    return characteristic.writeValue(uint32ToArrayBuffer(15)).then(char => {
        console.log('write done',char)
    });
    
    return characteristic.readValue().then(char => {
        console.log('hikoko3',char,char.getUint8(0))
        console.log('hikoko4',char,char.getUint8(1))
        console.log('hikoko4',char,char.getUint8(2))
    });
    
/*
  const countUp = () => {
      console.log('unko');
      return characteristic.readValue().then(char => {
        console.log('hikoko3',char,char.getUint8(0))
        console.log('hikoko4',char,char.getUint8(1))
        console.log('hikoko4',char,char.getUint8(2))
      });
  }
  setInterval(countUp, 50);
  */
});

});

//ClickEvent
document.getElementById("button2").addEventListener("click", function(){
    console.log('hi button2');

    // 1.BLEデバイスをスキャンする
navigator.bluetooth.requestDevice({
  acceptAllDevices:true, // 全てのデバイスを対象にスキャンを実施する
  optionalServices:['0000fff0-0000-1000-8000-00805f9b34fb']
}).then(device => {

  // 2.デバイスに接続
  return device.gatt.connect();

}).then(server =>{

  // 3-1.「Service」を指定
  return server.getPrimaryService("0000fff0-0000-1000-8000-00805f9b34fb");

}).then(service =>{
    console.log('hikoko')

  // 3-2.「Characteristc」を指定
  return service.getCharacteristic("0000fff3-0000-1000-8000-00805f9b34fb");

}).then((characteristic)  => {
    console.log('hikoko2')

  //4.受信準備を行う
  return characteristic.startNotifications().then(char => {
    console.log('hikoko3',char)

    //5.受信したバイナリを解析、処理の実施
    characteristic.addEventListener('characteristicvaluechanged', (event) => {
        console.log(event.target.value,'event.target.value');
      // 「event.target.value」がDataView型で渡ってくるのでこれを解析

    });
  });
});


});

    
</script>
    </body>
</html>

Angularを用いる方法

GiuHubの方にまとめました.

https://github.com/NP-Systems/demo-project-of-angular-ble/tree/main