toDataURL()メソッド利用の際の 「Tainted canvases may not be exported」エラーについて

1

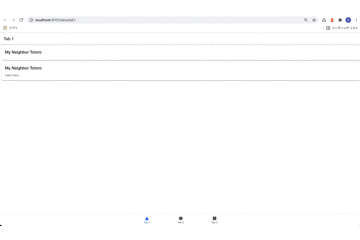
Google Cloud のStorageからJavaScriptで画像をダウンロードしてCanvasに書き込んだとき,そのCanvas要素の画像をtoDataURL()メソッドでdataURIに変換する際に

Failed to execute 'toDataURL' on 'HTMLCanvasElement': Tainted canvases may not be exported.

というエラーが出る.直訳すると

「HTMLCanvasElement」で「toDataURL」の実行に失敗しました:汚染されたキャンバスはエクスポートされない可能性があります。

つまり,Corsポリシーに引っかかってしまう.解決するためにはフロントエンドのJavaScriptで任意のドメインからのデータを利用できるように明示的に指定する必要と,生成元からデータを返す際にCorsポリシーを適用しないドメインを明示的に指定する必要がある.

フロントエンドの方法

Canvas要素に描く際に生成元をanounymousに設定すればいい

  download(){
    var gsReference = this.firestorage.refFromURL('gs://my-app.appspot.com/imgs/'+this.authUid +'/'+this.query_img_name)
    const task = gsReference.getDownloadURL().subscribe(dataurl => {
      console.log(dataurl,'tsk');
      const image = new Image();
      image.onload = () => {
        this.canvas.nativeElement.width = image.width;
        this.canvas.nativeElement.height = image.height;
        this.canvas_rendering_context.drawImage(image, 0, 0);
      }
      (→これを追加)image.crossOrigin = "anonymous";
      image.src = dataurl;

    })
  }

生成元の変更

今回はGoogle CloudのStorageから画像をダウンロードしている.従ってStorageの設定をいじる必要がある.

my-cors.jsonなどのファイルを使って設定情報を書いたあと,gsutilコマンドを使ってStorageに反映させればいい.

touch my-cors.json
 nano my-cors.json

my-cors.jsonは下記のように変更しておく

[
    {
      "origin": ["*"],
      "method": ["GET","POST"],
      "responseHeader": ["Content-Type"],
      "maxAgeSeconds": 3600
    }
]

あとはコマンドから反映させる

gsutil cors set ./my-cors.json gs://my-app.appspot.com 

参考文献

https://cloud.google.com/storage/docs/configuring-cors

Angularでpipeを使って日付データをフォーマットする

1

準備

標準機能なので追加のインストールは必要ありません.module.tsで@angular/commonからDatePipeをインストールし,providersに登録します.

import { IonicModule } from '@ionic/angular';
import { RouterModule } from '@angular/router';
import { NgModule } from '@angular/core';
import { CommonModule } from '@angular/common';
import { FormsModule } from '@angular/forms';
import { Tab3Page } from './tab3.page';
import { ExploreContainerComponentModule } from '../explore-container/explore-container.module';
+import { DatePipe } from '@angular/common';

import { Tab3PageRoutingModule } from './tab3-routing.module';

@NgModule({
  imports: [
    IonicModule,
    CommonModule,
    FormsModule,
    ExploreContainerComponentModule,
    RouterModule.forChild([{ path: '', component: Tab3Page }]),
    Tab3PageRoutingModule,
  ],
-  declarations: [Tab3Page]
+  declarations: [Tab3Page],
+  providers: [DatePipe]
})
export class Tab3PageModule {}

次に,page.tsファイルで読み込みます.

import { Component,ElementRef,ViewChild } from '@angular/core';
+import { DatePipe } from '@angular/common';

@Component({
  selector: 'app-tab3',
  templateUrl: 'tab3.page.html',
  styleUrls: ['tab3.page.scss']
})
export class Tab3Page {

  constructor(
+    private datePipe: DatePipe
  ) {
  }

  ionViewDidEnter(){
  }

}

HTMLでの表示を変えたい場合

import { Component,ElementRef,ViewChild } from '@angular/core';
import { DatePipe } from '@angular/common';

@Component({
  selector: 'app-tab3',
  templateUrl: 'tab3.page.html',
  styleUrls: ['tab3.page.scss']
})
export class Tab3Page {
+  time_on_html:any;
  constructor(
    private datePipe: DatePipe
  ) {
  }

  ionViewDidEnter(){
+    this.time_on_html = new Date();
+    console.log(this.time_on_html);
  }

}

そして,HTML側は{{time_on_html | date:”MM/dd/yy” }}で参照します.

tsファイルの中で表示を変えたい場合

import { Component,ElementRef,ViewChild } from '@angular/core';
import { DatePipe } from '@angular/common';

@Component({
  selector: 'app-tab3',
  templateUrl: 'tab3.page.html',
  styleUrls: ['tab3.page.scss']
})
export class Tab3Page {
  time_on_html:any;
  constructor(
    private datePipe: DatePipe
  ) {
  }

  ionViewDidEnter(){
    this.time_on_html = this.datePipe.transform(new Date(), 'yyyyMMddHHmmss');
    console.log(this.time_on_html);

  }

}

2021/07/19 18:42:52と表示される.

画像のオブジェクトURLをCanvas要素に描写する

1

Capacitorのカメラプラグインでの動作記録

image2.onloadファンクションでアロー関数を使う場合

export class Tab3Page {
  @ViewChild('canvas') public canvas: ElementRef;
  public cx: CanvasRenderingContext2D;

  constructor(
  ) {}

  ionViewDidEnter(){
    this.startCamera();
    const canvasEl: HTMLCanvasElement = this.canvas.nativeElement;
    this.cx = canvasEl.getContext('2d');
  }
  
async startCamera(){
    const imageFunc = await Camera.getPhoto({
      quality: 90,
      allowEditing: false,
      resultType: CameraResultType.Uri,
    }).then((image) => {

      // image.webPath will contain a path that can be set as an image src.
      // You can access the original file using image.path, which can be
      // passed to the Filesystem API to read the raw data of the image,
      // if desired (or pass resultType: CameraResultType.Base64 to getPhoto)
      var imageUrl = image.webPath;
      console.log(imageUrl);

      let image2:any = new Image();
      image2.onload = () => {
        console.log(image2.width);
        console.log(image2.height);
        this.cx.canvas.width = image2.width;
        this.cx.canvas.height = image2.height;
        aa.drawImage(image2, 0, 0);
        console.log('done');
      }
      image2.src = imageUrl;
    });
  };

よく乗っているもの

  export class Tab3Page {
  @ViewChild('canvas') public canvas: ElementRef;
  public cx: CanvasRenderingContext2D;

  constructor(
  ) {}

  ionViewDidEnter(){
    this.startCamera();
    const canvasEl: HTMLCanvasElement = this.canvas.nativeElement;
    this.cx = canvasEl.getContext('2d');
  }

async startCamera(){
    const imageFunc = await Camera.getPhoto({
      quality: 90,
      allowEditing: false,
      resultType: CameraResultType.Uri,
    }).then((image) => {

      // image.webPath will contain a path that can be set as an image src.
      // You can access the original file using image.path, which can be
      // passed to the Filesystem API to read the raw data of the image,
      // if desired (or pass resultType: CameraResultType.Base64 to getPhoto)
      var imageUrl = image.webPath;
      console.log(imageUrl);
      let canvasVar:any =this.cx;

      let image2:any = new Image();
      let aa:any =this.cx;
      image2.onload = function() {
        canvasVar.canvas.width = image2.width;
        canvasVar.canvas.height = image2.height;
        aa.drawImage(image2, 0, 0);
        console.log('done');
      }
      image2.src = imageUrl;
    });
  };

bind(this)を使ってこれでもいく

export class Tab3Page {
  @ViewChild('canvas') public canvas: ElementRef;
  public cx: CanvasRenderingContext2D;

  constructor(
  ) {}

  ionViewDidEnter(){
    this.startCamera();
    const canvasEl: HTMLCanvasElement = this.canvas.nativeElement;
    this.cx = canvasEl.getContext('2d');
  }
  
async startCamera(){
    const imageFunc = await Camera.getPhoto({
      quality: 90,
      allowEditing: false,
      resultType: CameraResultType.Uri,
    }).then((image) => {

      // image.webPath will contain a path that can be set as an image src.
      // You can access the original file using image.path, which can be
      // passed to the Filesystem API to read the raw data of the image,
      // if desired (or pass resultType: CameraResultType.Base64 to getPhoto)
      var imageUrl = image.webPath;
      console.log(imageUrl);
      let canvasVar:any =this.cx;

      let image2:any = new Image();
      let aa:any =this.cx;
      image2.onload = function() {
        this.cx.canvas.width = image2.width;
        this.cx.canvas.height = image2.height;
        aa.drawImage(image2, 0, 0);
        console.log('done');
      }.bind(this)
      image2.src = imageUrl;
    });
  };

https://stackoverflow.com/questions/30824756/javascript-saving-this-variable-inside-of-image-onload

Angular(Ionic)でアコーディオンを作成する

1

Angular(Ionic)でカスタムコンポーネントを使ってアコーディオンを作成する方法です.

今回はIonicのTabsプロジェクトをもとに作成し,Tab1に設置することにします.

まず,tab1の中にコンポーネントを作成します.

ionic g component tab1/components/expandable

次に作成したコンポーネントを下記のように書き換えます.

<div #expandWrapper class='expand-wrapper' [class.collapsed]="!expanded">
    <ng-content></ng-content>
</div>
.expand-wrapper {
  transition: max-height 0.4s ease-in-out;
  overflow: hidden;
  height: auto;
}

.collapsed {
  max-height: 0 !important;
}
import { Component, AfterViewInit, Input, ViewChild,  ElementRef, Renderer2 } from "@angular/core";

@Component({
  selector: 'app-expandable',
  templateUrl: './expandable.component.html',
  styleUrls: ['./expandable.component.scss'],
})
export class ExpandableComponent implements AfterViewInit {
  @ViewChild("expandWrapper", { read: ElementRef }) expandWrapper: ElementRef;
  @Input("expanded") expanded: boolean = false;
  @Input("expandHeight") expandHeight: string = "150px";

  constructor(public renderer: Renderer2) {}

  ngAfterViewInit() {
    this.renderer.setStyle(this.expandWrapper.nativeElement, "max-height", this.expandHeight);
  }
}

以上でコンポーネントは作成できました.

次にTab1にコンポーネントを登録します.moduleで読み込んで,declarationsに登録します.これによりapp-expandableタグを使ってTab1のHTMLからコンポーネントを呼び出せるようになります.

import { IonicModule } from '@ionic/angular';
import { NgModule } from '@angular/core';
import { CommonModule } from '@angular/common';
import { FormsModule } from '@angular/forms';
import { Tab1Page } from './tab1.page';
import { ExploreContainerComponentModule } from '../explore-container/explore-container.module';

import { Tab1PageRoutingModule } from './tab1-routing.module';
import { ImageCropperModule } from 'ngx-image-cropper';

+import { ExpandableComponent } from "./components/expandable/expandable.component";

@NgModule({
  imports: [
    IonicModule,
    CommonModule,
    FormsModule,
    ExploreContainerComponentModule,
    Tab1PageRoutingModule,
    ImageCropperModule
  ],
  declarations: [
    Tab1Page,
+    ExpandableComponent
  ]
})
export class Tab1PageModule {}

実装

あとはtab1.page.htmlとtab1.page.tsに書くだけです.

<ion-header [translucent]="true">
  <ion-toolbar>
    <ion-title>
      Tab 1
    </ion-title>
  </ion-toolbar>
</ion-header>


<ion-content>
  <ion-card (click)="expandItem()">
    <ion-card-header>
      <ion-card-title>My Neighbor Totoro</ion-card-title>
    </ion-card-header>

    <ion-card-content>
      <app-expandable expandHeight="100px" [expanded]="item1expand">
        <p>
          Hello there.
        </p>
      </app-expandable>
    </ion-card-content>
  </ion-card>
  <ion-card (click)="expandItem()">
    <ion-card-header>
      <ion-card-title>My Neighbor Totoro</ion-card-title>
    </ion-card-header>

    <ion-card-content>
      <app-expandable expandHeight="100px" [expanded]="item2expand">
        <p>
          Hello there.
        </p>
      </app-expandable>
    </ion-card-content>
  </ion-card>


</ion-content>
import { Component, ViewChild, ElementRef } from '@angular/core';
import { Observable } from 'rxjs';

@Component({
  selector: 'app-tab1',
  templateUrl: 'tab1.page.html',
  styleUrls: ['tab1.page.scss']
})
export class Tab1Page {
  item1expand:boolean = true;
  item2expand:boolean = false;

  constructor(
  ) {}

  expandItem(): void {
    this.item1expand = !this.item1expand;
    this.item2expand = !this.item2expand;
  }

}

AliExpressを使ってみた感想とデメリット

1

Amazonの代わりにAliExpressを使ってみた感想とデメリットです.

購入した経緯はこちら

AliExpressは中国のアリババグループが運営するECモールで,外国人向けに作られているものです.

メリット1:安い

最大のメリットは安価なことです.日本では1400円が相場の電子機器がアリエクスプレスだと800円で買えました.

メリット2:日本にないものがある

結構いい商品があります.目ききの能力があれば個人輸入もできそうだと思いました.

デメリット1:メールが多い

登録するとメールの配信が多くて,しかも止めることができません.かなり煩わしいです.

→止められました.

デメリット2:

クレジットカードを登録する必要がある.これはAmazonや楽天でも同じなのですが,裏でどのように情報を扱っているか信用できないのである程度の覚悟が必要だと思います.私はデビットカードにしました.

→他でも登録しないといけない以上,AliExperessのデメリットではないですね.

デメリット3:

配送に時間がかかる.3週間程度はかかります.

RaberryPiの一式を安く買う方法

1

Rasberry Pi4を一式で揃えると結構な値段がします.現在最も一般的なRasberry Pi4の4GBモデルだと本体,電源,HDMIケーブル,SDカードのセットで14000円程度が相場です.

でもRasberry Pi4の本体は8100円しかありません.日本だとどうも電源をはじめとする付属品で高くなっています.

そこで,付属品をいかに安く買うかが重要なのですが,中国のアリエクスプレスという電子モールから買うとかなり安くなります.アリエクスプレスはアリババが運営する海外むけのサイトで,個人での出品が禁止されているサイトなので比較的トラブルが少ないとされています.ここで電源アダプターなどを揃えるとかなり安くなります.

https://comprasyreise.com/shopnow

例えばラズベリーパイで案外高くつく電源アダプターです.5V 3Aとかなり高出力なアダプターであること,端子がUSB TypeCであることからレアで日本で買うと1400円が相場です.しかし,アリエクスプレスだと800円です.

配送料は1.48ドルですのでクーポン使って7.56ドルです.

私は普通にクレジットカードで買いました.

このサイトは情報を届ける代わりに広告を出しています.