GAEでPythonをデプロイする
1
# coding: utf-8
import os
import io
import time
import string
import random
import datetime
from flask import Flask, render_template, request, redirect, url_for, send_from_directory,send_file
from flask_cors import CORS
import inspect
import pandas as pd


app = Flask(__name__)
CORS(app)

@app.route('/',methods=["GET","POST"])
def hello():
    df = pd.DataFrame({'A':[i for i in range(100)]})
    a = str(list(df.T.to_dict().values()))
    print(a)
    return a
if __name__ == "__main__":
    pass
    #app.run(host='127.0.0.1',debug=True)
Flask==1.1.2
Flask-Cors==3.0.10
numpy==1.18.0
pandas==1.2.0runtime: python37 # or another supported version
service: default
instance_class: B1
basic_scaling:
max_instances: 1
idle_timeout: 5m2021年はPython37が良さそう.requirements.txtはpip3 listで表示されたものを書く.
Angular(Ionic)でHTTPリクエスト
1
AngularでバックエンドAPIへアクセスしてデータを取得する際、認証情報やクエリパラメータを付与したい時がある。
Post通信
import { Component, OnInit } from '@angular/core';
import { HttpClient } from '@angular/common/http';

@Component({ selector: 'app', templateUrl: 'app.component.html' })
export class AppComponent implements OnInit {
    postId;

    constructor(private http: HttpClient) { }

    ngOnInit() {
    const headers = { 'Authorization': 'Bearer my-token', 'My-Custom-Header': 'foobar' };
    const body = { title: 'Ionic POST Request Example' };
    this.http.post('https://example.com', body, { headers }).subscribe(data => {
        console.log(data);
    });
    }
}
Get通信
import { Component, OnInit } from '@angular/core';
import { HttpClient } from '@angular/common/http';

@Component({ selector: 'app', templateUrl: 'app.component.html' })
export class AppComponent implements OnInit {
    postId;

    constructor(private http: HttpClient) { }

    ngOnInit() {
    const headers = { 'Authorization': 'Bearer my-token', 'My-Custom-Header': 'foobar' };
    const parameters = { title: 'Ionic POST Request Example' };
    this.http.post('https://example.com',  { headers, parameters }).subscribe(data => {
        console.log(data);
    });
    }
}3月15日AngularでAdsense
もう3月を中旬ですね。もう春ですね!Yoasobiに最高にハマっています。
昨日ようやくAngular(Ionic)でAdsenseを表示できるようになりました。
https://adsense-demo.np-sys.com/
https://github.com/NP-Systems/Ionic-adsense-demo
にまとめました。結構苦労したけど、大きな進展があって良かったです。
宣伝兼ねて
にも回答しておきました。Analyticsの方で表示広告数がわかるので楽しみです。
次に実施したいこと
次はOCRアプリの方の刷新をしようかと思っています。
Integrate adsense in Ionic Angular.
1
Note:please keep in mind that I am not native English speaker.
In this article, I would like to summarize how to insert ads into Ionic (Angular) project using adsense.
Admob is more popular than adsense for Ionic, but Admob does not support web platforms. If you want to deploy your project as a web app, you need to use Adsense instead of Admob.
However, there is little information on how to use Adsense with Angular, let alone Ionic. Therefore, I would like to introduce the steps here in this article.
Summary
Basically, I recommend you to use ng2-adsense plugin, but it doesn’t work even if you implement it according to the instructions on the official page. You need to add some other code. In addition, it is important to have a ad with fixed size(not responsive). If you set your ad style with responsive, it will not work. Lastly, I recommend you to place your ad on the top area for your page. It may sounds nonsense, but it was important to me.
GitHub page
https://github.com/NP-Systems/Ionic-adsense-demo
Demo site
https://adsense-demo.np-sys.com
Environment
Angular11, Ionic6
Ionic:

   Ionic CLI                     : 6.13.1 (/usr/local/lib/node_modules/@ionic/cli)
   Ionic Framework               : @ionic/angular 5.6.0
   @angular-devkit/build-angular : 0.1102.4
   @angular-devkit/schematics    : 9.1.6
   @angular/cli                  : 11.2.4
   @ionic/angular-toolkit        : 2.2.0

Capacitor:

   Capacitor CLI   : 2.1.2
   @capacitor/core : 2.1.2

Utility:

   cordova-res                          : not installed
   native-run (update available: 1.3.0) : 1.0.0

System:

   NodeJS : v12.18.0 (/usr/local/bin/node)
   npm    : 6.14.6
   OS     : macOS Big Sur
the version of ng2-adsense was 9.1.0.
Steps
Create your project
ionic start adsense-demo blank --type=angular
cd  adsense-demo
Install plugin from here . https://github.com/scttcper/ng2-adsense
npm install ng2-adsensePlease note that you need to install the one that matches your version of Angular. You can specify plugin version as followings.
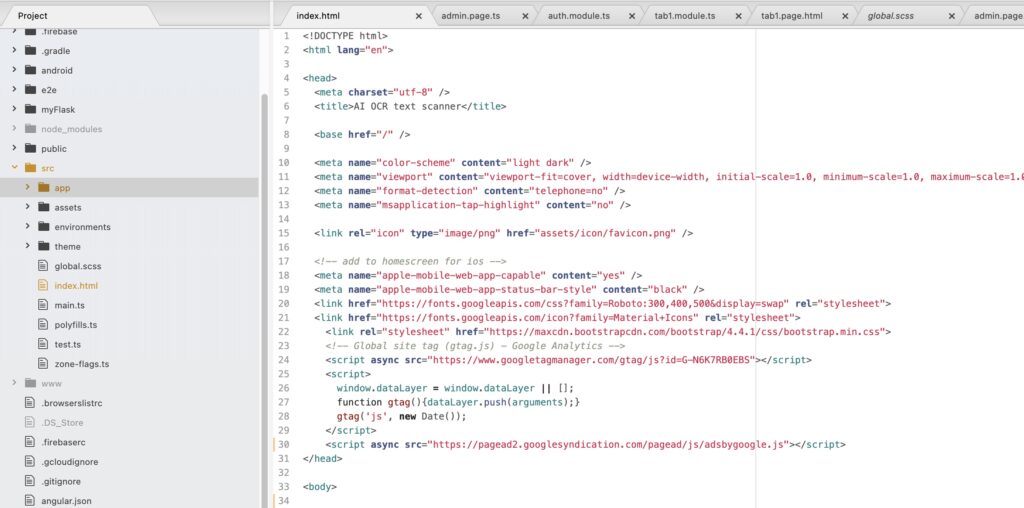
npm install ng2-adsense@9.1.0Next, add the following snippet in Index.html(above </head>).
<script async src=//pagead2.googlesyndication.com/pagead/js/adsbygoogle.js></script>It should look like the picture below.
Next, add following codes to the module where you want to place your ad. Officially, it says to add to app.module.ts, but please add it into the module you want to use. For example, add code into home.module.ts as shown below.

The codes you need to add are followings.
import { AdsenseModule } from 'ng2-adsense';@NgModule({
imports: [
<Other modules>,
AdsenseModule.forRoot({
adClient: 'ca-pub-XXXXXXXXXXXXXX',
adSlot: XXXXXXXXXXX,
}),You don’t have to add anything to home.page.ts.
Then add snippet below into home.page.html.
  </ion-header>
<ion-content>

<script async src="https://pagead2.googlesyndication.com/pagead/js/adsbygoogle.js"></script>
  <!-- ocr-app -->
  <ins class="adsbygoogle"
       style="display:inline-block;width:728px;height:90px"
       data-ad-client="ca-pub-XXXXXXXXXXXXXX"
       data-ad-slot="XXXXXXXXX"></ins>
  <script>
       (adsbygoogle = window.adsbygoogle || []).push({});
  </script>

  <ng-adsense></ng-adsense>
Please note the followings.
- Create ad styles in fixed size, not responsive mode (I recommend you to create ad with inline-block; width: 728px; height: 90px).
- Add the snippet on top of the ion-content tag.
If you set ad style to responsive, it will not work. If you do not add it to the top of the ion-content tag, it will not work neither. I know it sounds strange, but I think Adsense doesn’t recognize content in Angular page. So I recommend you to do that.
Furthermore, it sounds strange to add the snippet starting with “<script” tag. However, this was also necessary for me to work.
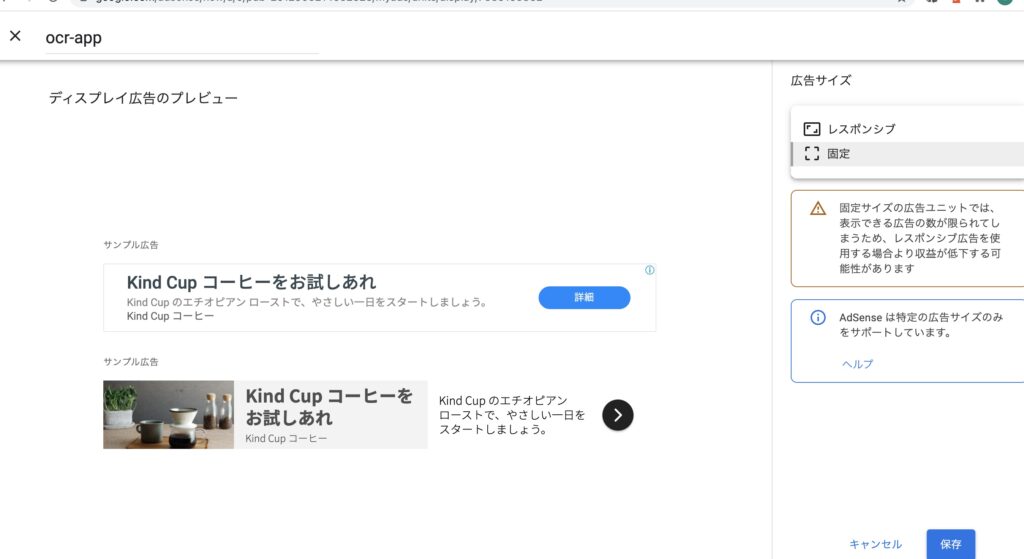
You can check adClient and adSlot and snippet in your adsense page.
To see your snippet, click the <> button at the bottom right of the screen below.

Also, to change the style of your ad from responsive to fixed size, press the pencil mark to fix it from responsive.
It it my pleasure to visit following demo site.
https://adsense-demo.np-sys.com
Thank you.
HTMLで要素の位置を調整する
1
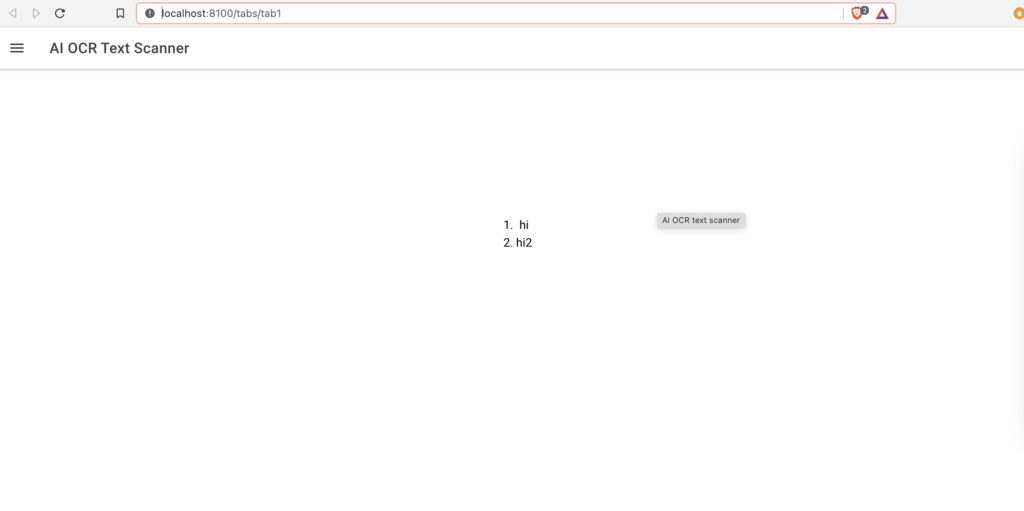
要素を真ん中におく
このように真ん中におきたい時
    <div class="ion-text-center my-class-parent">
        <ol class="my-class-child">
          <li>hi</li>
          <li>hi2</li>
        </ol>
    </div>
.my-class-parent {
height: 100%;
position: relative;
}
.my-class-child {
position: absolute;
left: 50%;
top:30%;
padding-left: 0;
}my-class-parentでBody要素に対する長さを100%に指定しており、それに対してmy-class-childで場所を指定している、
2つの要素を横に並べたい時
並べたい要素をまとめて囲ったTagにdisplay:flexをつけてやる.あとはboxの幅を100%で指定しているので,Imgで幅を指定したらそれを埋めてくれるようになる
                      <div class="flex">
                      <img src="assets/img/syabani.jpg" alt="" >
                      <div class="box">{{welcomeMessage}}</div>
                      </div>
.flex{
display: flex;
/*justify-content: center;*/
}
.flex img{
max-width: 100%;
width: 30%;
height: auto;
}
div.box{
width: 100%;
background-color:#CCCCFF;
}(Google Cloud Platform)CloudFunctionsとAppEngineどちらにするか
外貨預金としてFXを使用していますが、自動売買のようなものをやってみたくなりました。でもFXは外貨預金として始めたものだし、FXのギャンブル性に危険が怖くもあるので、外貨預金用の口座と自動売買用の口座を別に持つことにしました。
外貨預金用はSBIを使っています(アフィリエイトはやってませんが)
で、お小遣いを入れるのはOanda。こちらは3年前の口座を復活させました。
余談ですが、SBIFXは大変使いやすいです。外貨預金用としては非常にいいです。ただ、APIを提供していないです。というか、APIを提供しているのはOandaだけなんですよね。。カスタマーサポートは悪いし、スワップポイント低いしで以前愛想つかしたのですが、まぁAPIを提供しているのはここだけなのでしょうがないですね。
SBIFXは預金用です。売買は基本しません。超長期保有です。Oandaはお小遣い、遊びという位置付けです。自由にやります。昨日、名古屋の丸善でこんな本を買いました。おもしろかったです。これを実現するようなソフトを作成することにしました。
どうやってソフトを作ろうかという話で、最初はRasberryPi4にしようとおもったんですよね。メモリも4Gbあるので、これをローカルで動かして、為替データを取得して、グラフ化するというのはどうかというわけです。これは2018年に仮想通貨で使った手法なので簡単にできるのですが、なんか以前と同じ方法というのはつまらないと思いました。
そこで、今回はGoogleCloudPlatformとWebを使って同じことができないかと考えました。
GoogleCloudPlatformで行うことは2つです。
1。為替APIを使って定常的にデータベースへ保存する
2。保存したデータを取得するAPIをさらに自作する
そのうえで、
3。自作APIでデータを扱えるWebアプリを作成します。
で、GoogleCloudPlatformで上記を実現するのにGoogleAppEngineとGoogleCloudFunctionsのどちらがいいか迷いました。先日作成したアプリではGoogleCloudFunctionsを使っているのですが、GoogleAppEngineのほうがメジャーですし、別にGoogleCloudFunctionsで不満はないのですが使いやすいのかなと。。でちょっと調べてみたんですけど、そもそも値段が違うんですよね。GoogleCloudFunctionsは一つの関数しか割り当てられない代わりにものすごくやすい。200万回の呼び出しは無料で、次の200万回で1ドル程度の料金です。驚きの安さである一方、GoogleAppEngineは驚きの高さなんですよね。。一番安いプランでも月に7ドルかかってしまいます。一つの関数しか割り当てられないGoogleCloudFunctionsと比べて使い勝手はよさそうだけど、あまり使いこなせるのかと。。
https://cloud.google.com/appengine/pricing?hl=ja

AppEngineは時間に対して料金がかかります。アイオワのサーバでインスタンスを作成した場合、1時間あたり0.01ドルなので、月に7ドル程度はかかってしまいます。
CloudFunctionsの場合
https://cloud.google.com/functions/pricing

こちらの場合は、回数に対して費用が発生します。最初の200万回が無料ということなので、よっぽどアクセスを集められる以外はCloudFunctionsのほうがよさそうです。
ただ、CloudFunctionsの場合は一つの関数しかアップできないのであまり使い勝手はよくないかもしれません。まぁ、CloudFunctionsで初めてみてからの移行にしようかな。。