画像のオブジェクトURLをCanvas要素に描写する

1

Capacitorのカメラプラグインでの動作記録

image2.onloadファンクションでアロー関数を使う場合

export class Tab3Page {
  @ViewChild('canvas') public canvas: ElementRef;
  public cx: CanvasRenderingContext2D;

  constructor(
  ) {}

  ionViewDidEnter(){
    this.startCamera();
    const canvasEl: HTMLCanvasElement = this.canvas.nativeElement;
    this.cx = canvasEl.getContext('2d');
  }
  
async startCamera(){
    const imageFunc = await Camera.getPhoto({
      quality: 90,
      allowEditing: false,
      resultType: CameraResultType.Uri,
    }).then((image) => {

      // image.webPath will contain a path that can be set as an image src.
      // You can access the original file using image.path, which can be
      // passed to the Filesystem API to read the raw data of the image,
      // if desired (or pass resultType: CameraResultType.Base64 to getPhoto)
      var imageUrl = image.webPath;
      console.log(imageUrl);

      let image2:any = new Image();
      image2.onload = () => {
        console.log(image2.width);
        console.log(image2.height);
        this.cx.canvas.width = image2.width;
        this.cx.canvas.height = image2.height;
        aa.drawImage(image2, 0, 0);
        console.log('done');
      }
      image2.src = imageUrl;
    });
  };

よく乗っているもの

  export class Tab3Page {
  @ViewChild('canvas') public canvas: ElementRef;
  public cx: CanvasRenderingContext2D;

  constructor(
  ) {}

  ionViewDidEnter(){
    this.startCamera();
    const canvasEl: HTMLCanvasElement = this.canvas.nativeElement;
    this.cx = canvasEl.getContext('2d');
  }

async startCamera(){
    const imageFunc = await Camera.getPhoto({
      quality: 90,
      allowEditing: false,
      resultType: CameraResultType.Uri,
    }).then((image) => {

      // image.webPath will contain a path that can be set as an image src.
      // You can access the original file using image.path, which can be
      // passed to the Filesystem API to read the raw data of the image,
      // if desired (or pass resultType: CameraResultType.Base64 to getPhoto)
      var imageUrl = image.webPath;
      console.log(imageUrl);
      let canvasVar:any =this.cx;

      let image2:any = new Image();
      let aa:any =this.cx;
      image2.onload = function() {
        canvasVar.canvas.width = image2.width;
        canvasVar.canvas.height = image2.height;
        aa.drawImage(image2, 0, 0);
        console.log('done');
      }
      image2.src = imageUrl;
    });
  };

bind(this)を使ってこれでもいく

export class Tab3Page {
  @ViewChild('canvas') public canvas: ElementRef;
  public cx: CanvasRenderingContext2D;

  constructor(
  ) {}

  ionViewDidEnter(){
    this.startCamera();
    const canvasEl: HTMLCanvasElement = this.canvas.nativeElement;
    this.cx = canvasEl.getContext('2d');
  }
  
async startCamera(){
    const imageFunc = await Camera.getPhoto({
      quality: 90,
      allowEditing: false,
      resultType: CameraResultType.Uri,
    }).then((image) => {

      // image.webPath will contain a path that can be set as an image src.
      // You can access the original file using image.path, which can be
      // passed to the Filesystem API to read the raw data of the image,
      // if desired (or pass resultType: CameraResultType.Base64 to getPhoto)
      var imageUrl = image.webPath;
      console.log(imageUrl);
      let canvasVar:any =this.cx;

      let image2:any = new Image();
      let aa:any =this.cx;
      image2.onload = function() {
        this.cx.canvas.width = image2.width;
        this.cx.canvas.height = image2.height;
        aa.drawImage(image2, 0, 0);
        console.log('done');
      }.bind(this)
      image2.src = imageUrl;
    });
  };

https://stackoverflow.com/questions/30824756/javascript-saving-this-variable-inside-of-image-onload

Angular(Ionic)でアコーディオンを作成する

1

Angular(Ionic)でカスタムコンポーネントを使ってアコーディオンを作成する方法です.

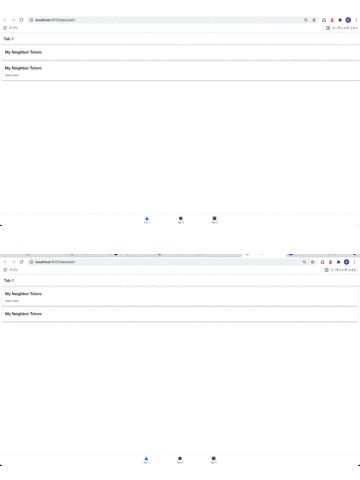
今回はIonicのTabsプロジェクトをもとに作成し,Tab1に設置することにします.

まず,tab1の中にコンポーネントを作成します.

ionic g component tab1/components/expandable

次に作成したコンポーネントを下記のように書き換えます.

<div #expandWrapper class='expand-wrapper' [class.collapsed]="!expanded">
    <ng-content></ng-content>
</div>
.expand-wrapper {
  transition: max-height 0.4s ease-in-out;
  overflow: hidden;
  height: auto;
}

.collapsed {
  max-height: 0 !important;
}
import { Component, AfterViewInit, Input, ViewChild,  ElementRef, Renderer2 } from "@angular/core";

@Component({
  selector: 'app-expandable',
  templateUrl: './expandable.component.html',
  styleUrls: ['./expandable.component.scss'],
})
export class ExpandableComponent implements AfterViewInit {
  @ViewChild("expandWrapper", { read: ElementRef }) expandWrapper: ElementRef;
  @Input("expanded") expanded: boolean = false;
  @Input("expandHeight") expandHeight: string = "150px";

  constructor(public renderer: Renderer2) {}

  ngAfterViewInit() {
    this.renderer.setStyle(this.expandWrapper.nativeElement, "max-height", this.expandHeight);
  }
}

以上でコンポーネントは作成できました.

次にTab1にコンポーネントを登録します.moduleで読み込んで,declarationsに登録します.これによりapp-expandableタグを使ってTab1のHTMLからコンポーネントを呼び出せるようになります.

import { IonicModule } from '@ionic/angular';
import { NgModule } from '@angular/core';
import { CommonModule } from '@angular/common';
import { FormsModule } from '@angular/forms';
import { Tab1Page } from './tab1.page';
import { ExploreContainerComponentModule } from '../explore-container/explore-container.module';

import { Tab1PageRoutingModule } from './tab1-routing.module';
import { ImageCropperModule } from 'ngx-image-cropper';

+import { ExpandableComponent } from "./components/expandable/expandable.component";

@NgModule({
  imports: [
    IonicModule,
    CommonModule,
    FormsModule,
    ExploreContainerComponentModule,
    Tab1PageRoutingModule,
    ImageCropperModule
  ],
  declarations: [
    Tab1Page,
+    ExpandableComponent
  ]
})
export class Tab1PageModule {}

実装

あとはtab1.page.htmlとtab1.page.tsに書くだけです.

<ion-header [translucent]="true">
  <ion-toolbar>
    <ion-title>
      Tab 1
    </ion-title>
  </ion-toolbar>
</ion-header>


<ion-content>
  <ion-card (click)="expandItem()">
    <ion-card-header>
      <ion-card-title>My Neighbor Totoro</ion-card-title>
    </ion-card-header>

    <ion-card-content>
      <app-expandable expandHeight="100px" [expanded]="item1expand">
        <p>
          Hello there.
        </p>
      </app-expandable>
    </ion-card-content>
  </ion-card>
  <ion-card (click)="expandItem()">
    <ion-card-header>
      <ion-card-title>My Neighbor Totoro</ion-card-title>
    </ion-card-header>

    <ion-card-content>
      <app-expandable expandHeight="100px" [expanded]="item2expand">
        <p>
          Hello there.
        </p>
      </app-expandable>
    </ion-card-content>
  </ion-card>


</ion-content>
import { Component, ViewChild, ElementRef } from '@angular/core';
import { Observable } from 'rxjs';

@Component({
  selector: 'app-tab1',
  templateUrl: 'tab1.page.html',
  styleUrls: ['tab1.page.scss']
})
export class Tab1Page {
  item1expand:boolean = true;
  item2expand:boolean = false;

  constructor(
  ) {}

  expandItem(): void {
    this.item1expand = !this.item1expand;
    this.item2expand = !this.item2expand;
  }

}

Angularでリアルタイムに変化するグラフを書く

1

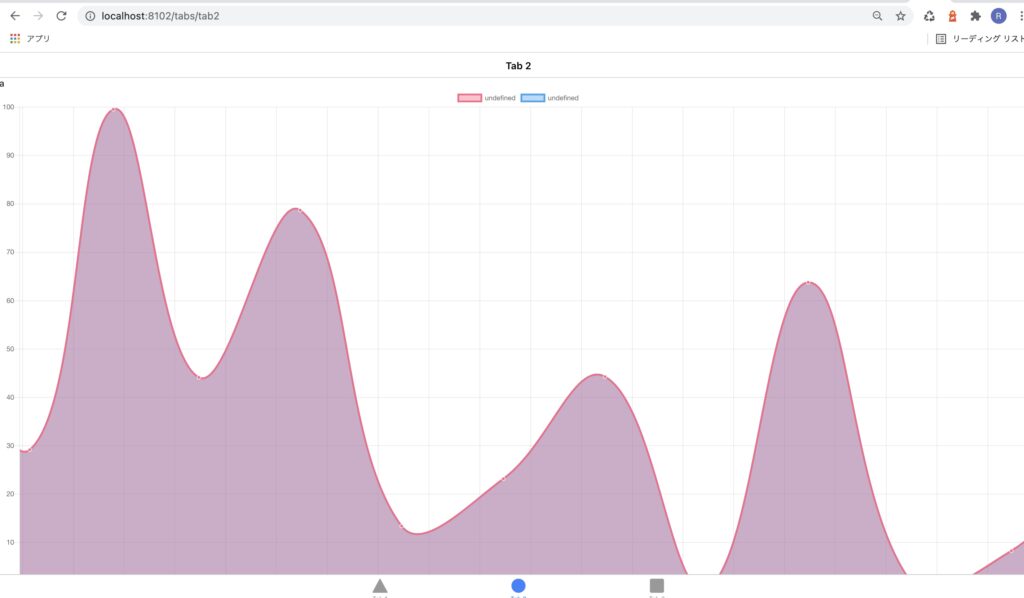
リアルタイムにデータが移り変わるグラフです.

realtime-streaming-data-with-angular-chartjs

概要

Angularでリアルタイムにデータが移り変わるグラフを作成します.

プロジェクトの作成

% ionic start app-name-streaming tabs --type=angular

プラグインのインストール

npm install ng2-charts@2 chartjs-plugin-streaming@1 --save
npm install chart.js@2.9.3 --save

プラグインの設定

app.module.tsで設定します.

import { NgModule } from '@angular/core';
import { BrowserModule } from '@angular/platform-browser';
import { RouteReuseStrategy } from '@angular/router';

import { IonicModule, IonicRouteStrategy } from '@ionic/angular';

import { AppRoutingModule } from './app-routing.module';
import { AppComponent } from './app.component';

+import { ChartsModule } from 'ng2-charts';

@NgModule({
  declarations: [AppComponent],
  entryComponents: [],
  imports: [
    BrowserModule,
    IonicModule.forRoot(),
    AppRoutingModule,
+    ChartsModule
  ],
  providers: [{ provide: RouteReuseStrategy, useClass: IonicRouteStrategy }],
  bootstrap: [AppComponent],
})
export class AppModule {}

リアルタイムに変化するグラフをかく

今回はIonicのタブプロジェクトのtab2に追加します.まずtab2.page.moduleにChartModuleを登録します.

import { IonicModule } from '@ionic/angular';
import { RouterModule } from '@angular/router';
import { NgModule } from '@angular/core';
import { CommonModule } from '@angular/common';
import { FormsModule } from '@angular/forms';
import { Tab2Page } from './tab2.page';
import { ExploreContainerComponentModule } from '../explore-container/explore-container.module';

import { Tab2PageRoutingModule } from './tab2-routing.module';
+import { ChartsModule } from 'ng2-charts';

@NgModule({
  imports: [
    IonicModule,
    CommonModule,
    FormsModule,
    ExploreContainerComponentModule,
    Tab2PageRoutingModule,
+    ChartsModule
  ],
  declarations: [Tab2Page]
})
export class Tab2PageModule {}

次にtab2.page.tsとtab2.page.htmlを編集します.

import { Component } from '@angular/core';
import 'chartjs-plugin-streaming';

@Component({
  selector: 'app-tab2',
  templateUrl: 'tab2.page.html',
  styleUrls: ['tab2.page.scss']
})
export class Tab2Page {

  myDataFromServer:number=20;
  updateMyDataFromServerFunction:any;

  datasets: any[] = [{
    data: []
  }, {
    data: []
  }];

  options: any;
  constructor( ) {}

  ngOnInit(){

    this.options= {
      scales: {
        xAxes: [{
          type: 'realtime',
          realtime: {
            onRefresh: (chart: any) =>{
              chart.data.datasets.forEach((dataset: any) => {  
                dataset.data.push({
                  x: Date.now(),
                  y:this.myDataFromServer
                });
              });
            },
            delay: 2000
          }
        }],
        yAxes: [{
          ticks: {
            max:100,
            min:0
          }
        }]
      }
    };
    this.updateMyDataFromServer();
  }

  updateMyDataFromServer(){
    console.log('updateMyDataFromServer() called');    
    this.updateMyDataFromServerFunction = setInterval(() => {
      console.log('called');
      this.myDataFromServer = Math.random() * 100;
      console.log(this.myDataFromServer,'this.myDataFromServer');
    },1000)
  }
}

リアルタイムに描写されるグラフが作成できました.

realtime-streaming-data-with-angular-chartjs

環境詳細

{
  "name": "1206_scrach_image",
  "version": "0.0.1",
  "author": "Ionic Framework",
  "homepage": "https://ionicframework.com/",
  "scripts": {
    "ng": "ng",
    "start": "ng serve",
    "build": "ng build",
    "test": "ng test",
    "lint": "ng lint",
    "e2e": "ng e2e"
  },
  "private": true,
  "dependencies": {
    "@angular/common": "~12.0.1",
    "@angular/core": "~12.0.1",
    "@angular/forms": "~12.0.1",
    "@angular/platform-browser": "~12.0.1",
    "@angular/platform-browser-dynamic": "~12.0.1",
    "@angular/router": "~12.0.1",
    "@ionic/angular": "^5.5.2",
    "@nebulae/angular-ble": "^1.0.6",
    "@types/web-bluetooth": "0.0.9",
    "aes-js": "^3.1.2",
    "chart.js": "^2.9.3",
    "chartjs-plugin-streaming": "^1.9.0",
    "ng2-charts": "^2.4.2",
    "rxjs": "~6.6.0",
    "tslib": "^2.0.0",
    "zone.js": "~0.11.4"
  },
  "devDependencies": {
    "@angular-devkit/build-angular": "~12.0.1",
    "@angular-eslint/builder": "~12.0.0",
    "@angular-eslint/eslint-plugin": "~12.0.0",
    "@angular-eslint/eslint-plugin-template": "~12.0.0",
    "@angular-eslint/template-parser": "~12.0.0",
    "@angular/cli": "~12.0.1",
    "@angular/compiler": "~12.0.1",
    "@angular/compiler-cli": "~12.0.1",
    "@angular/language-service": "~12.0.1",
    "@ionic/angular-toolkit": "^4.0.0",
    "@types/jasmine": "~3.6.0",
    "@types/jasminewd2": "~2.0.3",
    "@types/node": "^12.11.1",
    "@typescript-eslint/eslint-plugin": "4.16.1",
    "@typescript-eslint/parser": "4.16.1",
    "eslint": "^7.6.0",
    "eslint-plugin-import": "2.22.1",
    "eslint-plugin-jsdoc": "30.7.6",
    "eslint-plugin-prefer-arrow": "1.2.2",
    "jasmine-core": "~3.7.1",
    "jasmine-spec-reporter": "~5.0.0",
    "karma": "~6.3.2",
    "karma-chrome-launcher": "~3.1.0",
    "karma-coverage": "~2.0.3",
    "karma-coverage-istanbul-reporter": "~3.0.2",
    "karma-jasmine": "~4.0.0",
    "karma-jasmine-html-reporter": "^1.5.0",
    "protractor": "~7.0.0",
    "ts-node": "~8.3.0",
    "typescript": "~4.2.4"
  },
  "description": "An Ionic project"
}

Angularで画像を読み込む

1

そもそも

Imageオブジェクト,Fileオブジェクト,dataurlというのがキーワードになる.

FIleオブジェクトはInputタグから読み込んだもの.dataurlはブラウザ上で表示できるように文字列で表したもの.dataurlはdata:image/jpeg;base64,/9j/4AAQSkZJRgABAgEASAB****という文字列になる.

Inputタグからファイルを読み込んでcanvasに描写したい場合,Fileオブジェクトをdataurlに変換したあと,ImageオブジェクトのSRCとしてこれを設定する.canvasはdataurlを直接受け取ることはできないためImageオブジェクトに変換する.

一方,canvasからfirebaseのStorageに書き込む場合は,canvasからdataurlを生成し,それをバイナリデータであるFileオブジェクトに変換する.FileオブジェクトはそのままStorageに保存できる.

base64, blob,もあるが,base64はdataurlと似たもので,blobはブラウザ上で生成されたFileオブジェクトのことだと理解している.

基本

Inputタグから読み込んで,canvas要素に描写する.

  <div class="upload">
    <input type="file" accept="image/*"
           (change)="fileChangeEvent($event)">
  </div>

  <div class="parent">
    <canvas #canvas></canvas>
  </div>
import { Component,ElementRef,Input,ViewChild } from '@angular/core';
import { HttpClient } from '@angular/common/http';
import { Observable } from 'rxjs';

@Component({
  selector: 'app-tab1',
  templateUrl: 'tab1.page.html',
  styleUrls: ['tab1.page.scss']
})
export class Tab1Page {
  file: File = null;
  @ViewChild('canvas') public canvas: ElementRef;
  width:number;// = 1400;
  height:number;// = 1400;
  private cx: CanvasRenderingContext2D;

  constructor(
  ) {
  }

  ionViewDidEnter(){
    this.width=window.innerWidth;
    this.height=window.innerHeight;
    const canvasEl: HTMLCanvasElement = this.canvas.nativeElement;
    this.cx = canvasEl.getContext('2d');
  }

  fileChangeEvent(event: any): void {
    if (event.target.files.length === 0) {
      this.file = null;
      return;
    }
    console.log(this.cx,'cx');
    console.log(event.target.files[0],'event.target.files[0]');
    this.cellRender(event.target.files[0]).subscribe((dataUrl)=>{
      console.log(dataUrl,123);
      const image = new Image();
      let aa:any =this.cx;
      image.onload = function() {
        
        aa.drawImage(image, 0, 0);   
      }
      image.src = dataUrl;


    })

}

cellRender(file):Observable<any>{
  return new Observable(observer => {
    let reader = new FileReader();
    reader.readAsDataURL(file);
    reader.onload = function(){
      var dataUrl:any = reader.result;
      observer.next(dataUrl);
    }
  })
}
}

Inputタグで読み込んだデータは,event.target.filesで容易にアクセスできる.配列になっているので一つしか選択していない場合はevent.target.files[0]で取得できる.

% event.target.files[0]
File {name: "スクリーンショット 2021-05-19 7.04.28.jpg", lastModified: 1621375474163, lastModifiedDate: Wed May 19 2021 07:04:34 GMT+0900 (日本標準時), webkitRelativePath: "", size: 615460, …} "event.target.files[0]"

dataURLの形式にすると便利だが,AngularだとObserverを導入するとうまくいった.


  fileChangeEvent(event: any): void {
    if (event.target.files.length === 0) {
      this.file = null;
      return;
    }
    this.imageRender(event.target.files[0]).subscribe((dataUrl)=>{
         console.log(dataUrl)
        //data:image/jpeg;base64,/9j/4AAQSkZJRgABAgEASAB****
    })
}

imageRender(file):Observable<any>{
  return new Observable(observer => {
    let reader = new FileReader();
    reader.readAsDataURL(file);
    reader.onload = function(){
      var dataUrl:any = reader.result;
      observer.next(dataUrl);
    }
  })
}

さらにDataURLをcanvasに描写する.canvasで画像を描く際、drawImageというメソッドを用いるが,

によると,imageはHTMLImageElement, HTMLCanvasElement, HTMLVideoElement のいずれかを取ることができるということなので,dataUrlは受け取れない.従ってconst image = new Image();のように生成しておいて,image.srcでdataURLを読み込ませる.new Image()といってもconsole.log(image)で確認すると<img src=”da” />の形式だった.

  fileChangeEvent(event: any): void {
    //fileが選択されていなければリセット
    if (event.target.files.length === 0) {
      this.file = null;
      return;
    }
    
    console.log(event.target.files[0],'event.target.files[0]');
    this.imageRender(event.target.files[0]).subscribe((dataUrl)=>{
      console.log(dataUrl,123);
      const image = new Image();
      let canvasVar:any =this.cx;
      image.onload = function() {
        canvasVar.drawImage(image, 0, 0);   
      }
      image.src = dataUrl;
    })

}

imageRender(file):Observable<any>{
  return new Observable(observer => {
    let reader = new FileReader();
    reader.readAsDataURL(file);
    reader.onload = function(){
      var dataUrl:any = reader.result;
      observer.next(dataUrl);
    }
  })
}

以上でファイルオブジェクトからdataURL(base64と同等)に変換し,canvasへImageオブジェクトに変換して描写する流れができたので,次はcanvasからDataURlを生成し,ファイルオブジェクトを生成する.

<ion-header [translucent]="true">
  <ion-toolbar>
    <ion-title>
      Tab 1
    </ion-title>
  </ion-toolbar>
</ion-header>

<ion-content [fullscreen]="true">
  <ion-header collapse="condense">
    <ion-toolbar>
      <ion-title size="large">Tab 1</ion-title>
    </ion-toolbar>
  </ion-header>

  <div class="upload">
    <input type="file" accept="image/*"
           (change)="fileChangeEvent($event)">
  </div>

  <div class="parent">
    <canvas #canvas></canvas>
  </div>

  + <ion-button expand="full" shape='round' (click)='save()'>Save</ion-button>


</ion-content>
save(){
  const canvasEl: HTMLCanvasElement = this.canvas.nativeElement;
  var dataURI = canvasEl.toDataURL( "image/jpeg", 0.75 ) ;
  console.log(dataURI,'dataURI');
  
  var bin = atob(dataURI.split(',')[1].replace(/^.*,/, ''));
  var buffer = new Uint8Array(bin.length);
  for (var i = 0; i < bin.length; i++) {
      buffer[i] = bin.charCodeAt(i);
  }
  this.createdFileObject = new File([buffer.buffer], "name.jpg",{type: "image/jpeg"});

}

console.log(created)すると下記が確認できる.

{name: “name.jpg”, lastModified: 1622154958219, lastModifiedDate: Fri May 28 2021 07:35:58 GMT+0900 (日本標準時), webkitRelativePath: “”, size: 569, …}

Angular(Ionic)でfirebaseによるGoogle認証でエラー

1

Failed to compile.

src/app/authorization/authorization.service.ts:88:48 – error TS2339: Property ‘auth’ does not exist on type ‘typeof import(“/Users/masaya/Desktop/MyGoodness/210523_webAppTemplate/templateApp/node_modules/firebase/index”)’. 88 this.afAuth.signInWithPopup(new firebase.auth.GoogleAuthProvider());

というエラーが出るようになった.

package.jsonでバージョンを確認すると

"firebase": "^8.6.2",

だった.version8からのエラーらしい.

import * as firebase from ‘firebase/app’;

と書いていたのを

import firebase from ‘firebase/app’

とかいたら動作した.